Kangarootime Enrollment Quick Start Guide
Welcome to your Kangarootime enrollment setup! This comprehensive guide will walk you through the complete enrollment process from initial setup to managing your first enrollment submission.
🎯 Overview
This guide covers the essential steps to get your Kangarootime enrollment system up and running, including:
- ✅ Account setup and password creation
- ✅ Enrollment data review and configuration
- ✅ Complete enrollment process testing
- ✅ Lead management and approval workflow
Step 1: Kangarootime Website
After receiving your Kangarootime no-reply email that contains your unique email address, head to the Kangarootime website.
Enter your email address, and click the Forgot Password? link.
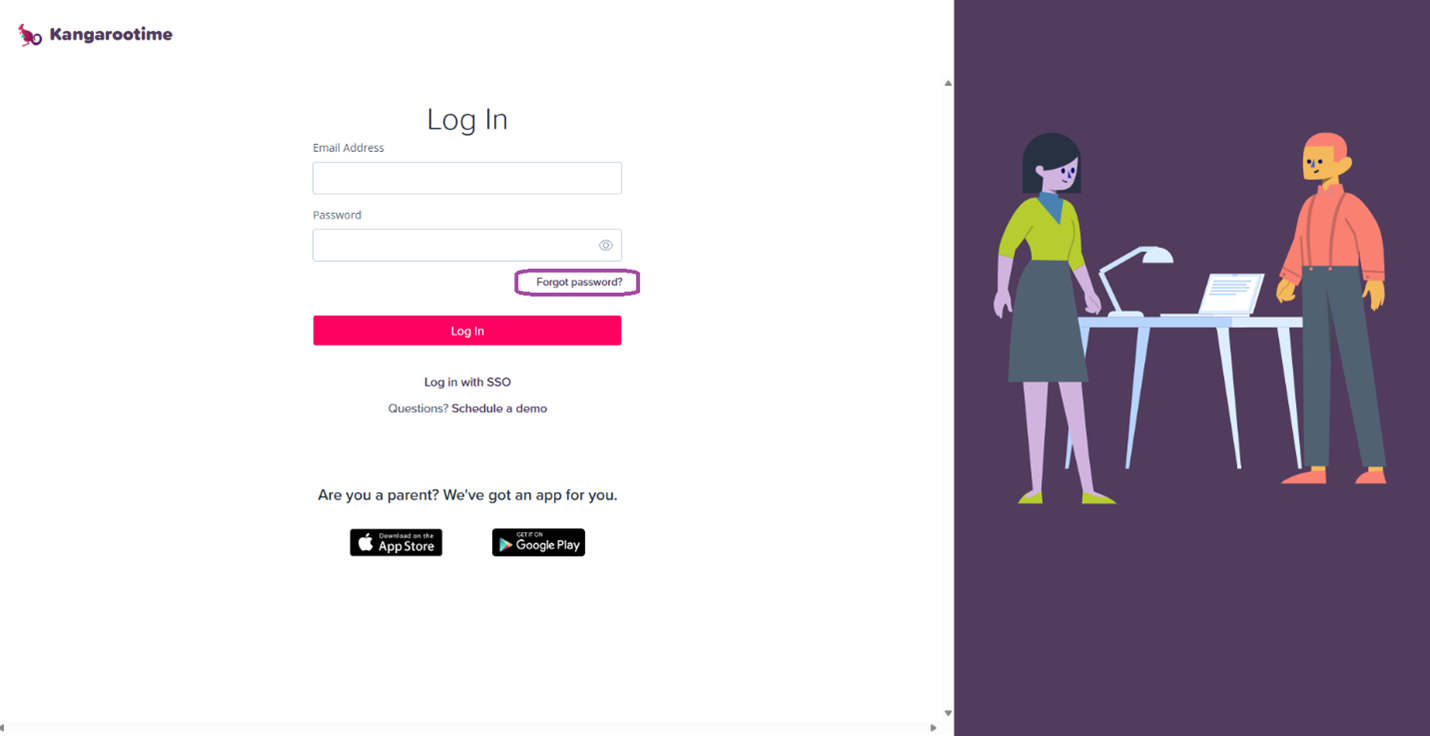
📧 Important: Make sure you have your unique email address from the Kangarootime no-reply email before proceeding.
Step 2: Create Your Unique Password
While on the login page, enter your unique email address that was emailed to you and then click the "Forgot Password" link to complete the prompts to finish your Kangarootime login credentials.
Once finished, return to the Kangarootime website to login.
🔐 Security Note: Use a strong, unique password for your Kangarootime account.
Step 3: Review Enrollment Data
Click into the Enrollment tab on the purple navigation menu.
Classes are the class programs your school will offer. Select your Default Class
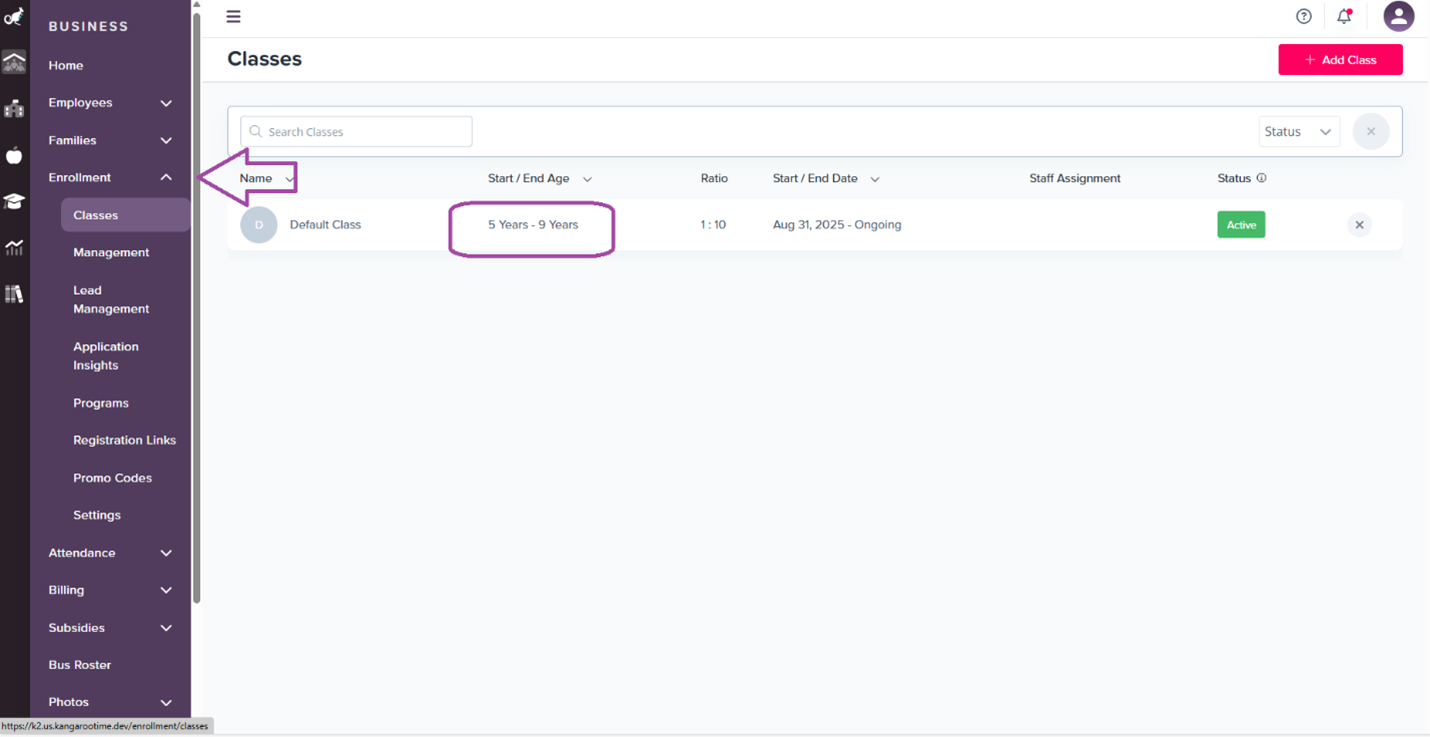
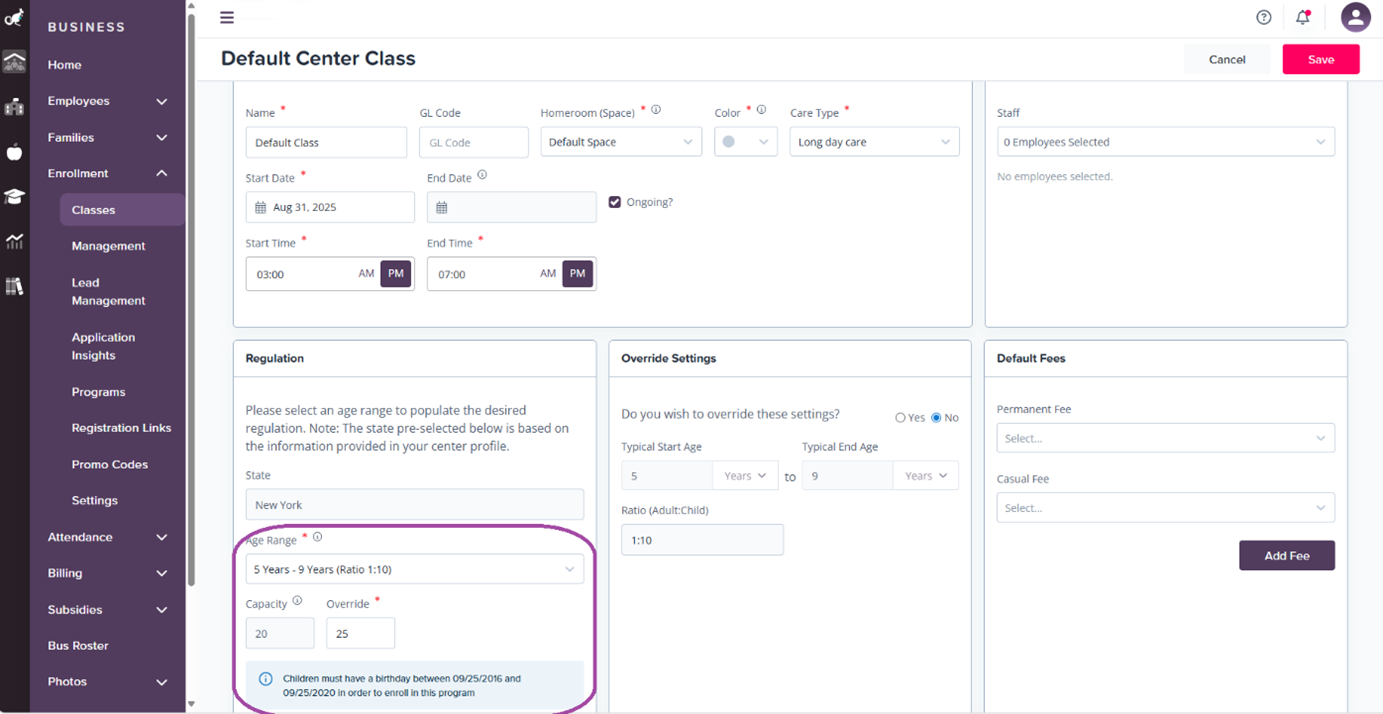
Class Capacity: This is how many children can be enrolled into this class program at one time.
Age Regulation: This is the age range that can enroll into this program. If a child does not fall within this age range, they will not be able to enroll into this class.
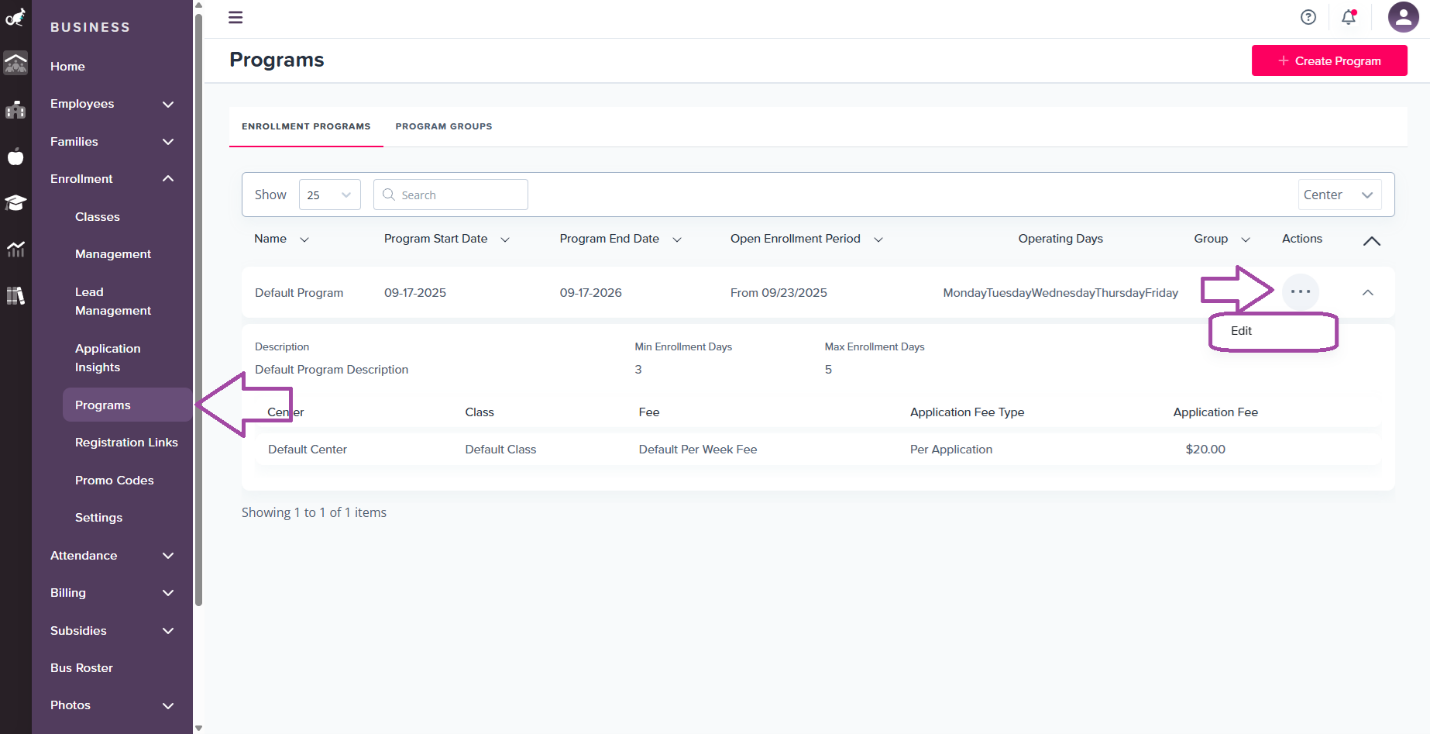
Programs: Enrollment Programs Your School(s) Will Offer To edit the program information, please click into the three dot action button and click Edit.
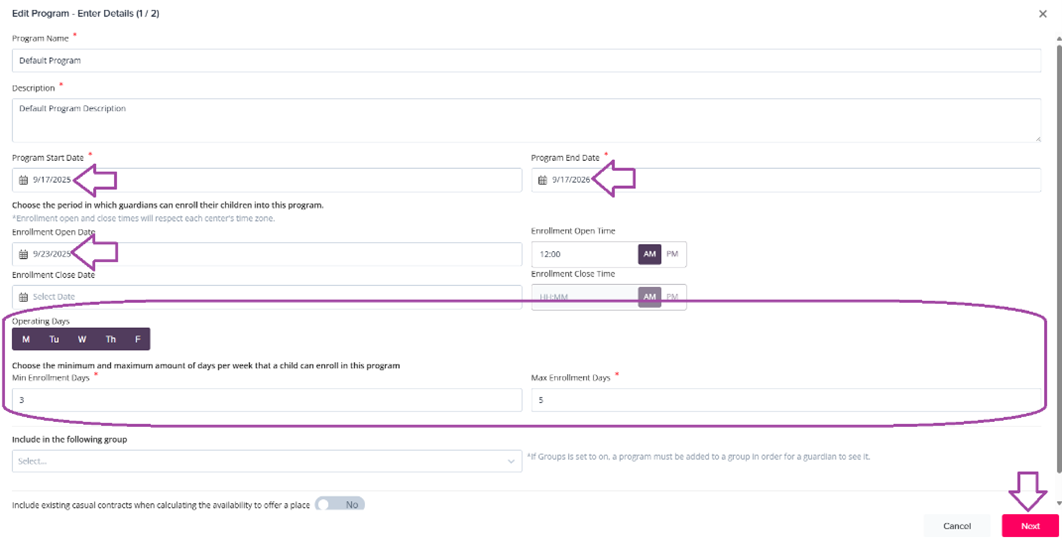
Program Configuration Details
Program Start and End Dates: This is how long this specific program will run. For example, your Summer Program may run from June 21st - September 15th, 2025.
Enrollment Open and Close Dates: Determine when parents can enroll in this program.
Operating Days: Set which days of the week this program can be offered and the minimum and maximum number of days a parent can choose from when enrolling in this program.
Once this page is completed, click Next.
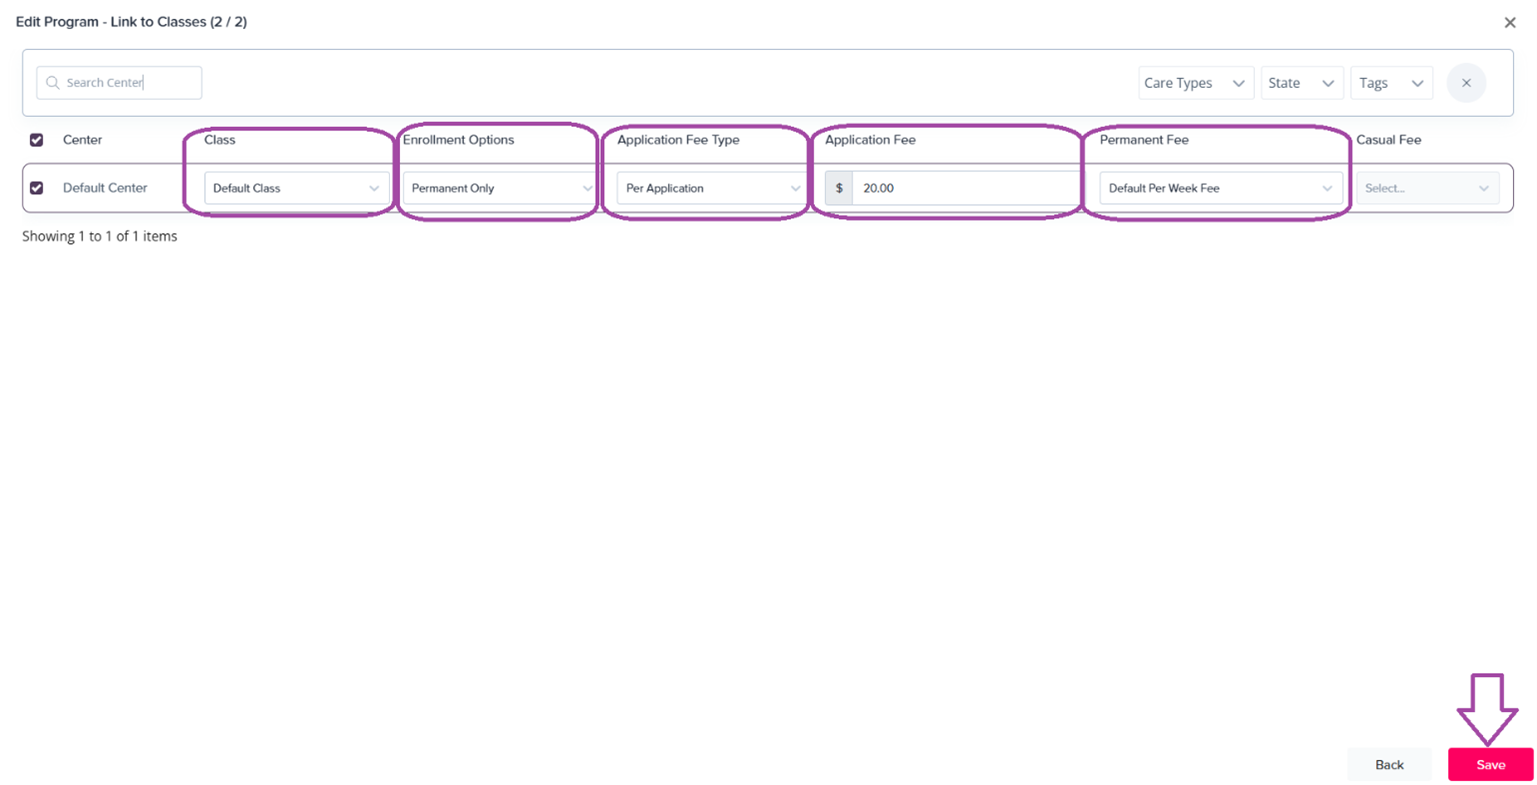
Program Assignments
Class Assignment: This is how the capacity and age range is configured into the program.
Enrollment Options: You have the flexibility to choose whether only permanent bookings can be made or if drop-in care can also be included.
Application Fee Type:
- Per Application: Charge the enrollment fee per application.
- Per Child: Charge the enrollment fee per child.
- Per Place: Charge the enrollment fee per how many spots a child is occupying.
Application Fee: This is what will be charged when a parent finishes the enrollment form.
⚠️ Testing Note: For testing purposes, we recommend setting this to $0.00, unless you implement a promo code to cover the cost.
Permanent and Casual Fee: The tuition cost for this program.
Once all this information is set, click Save.
Take one final review and click Confirm.
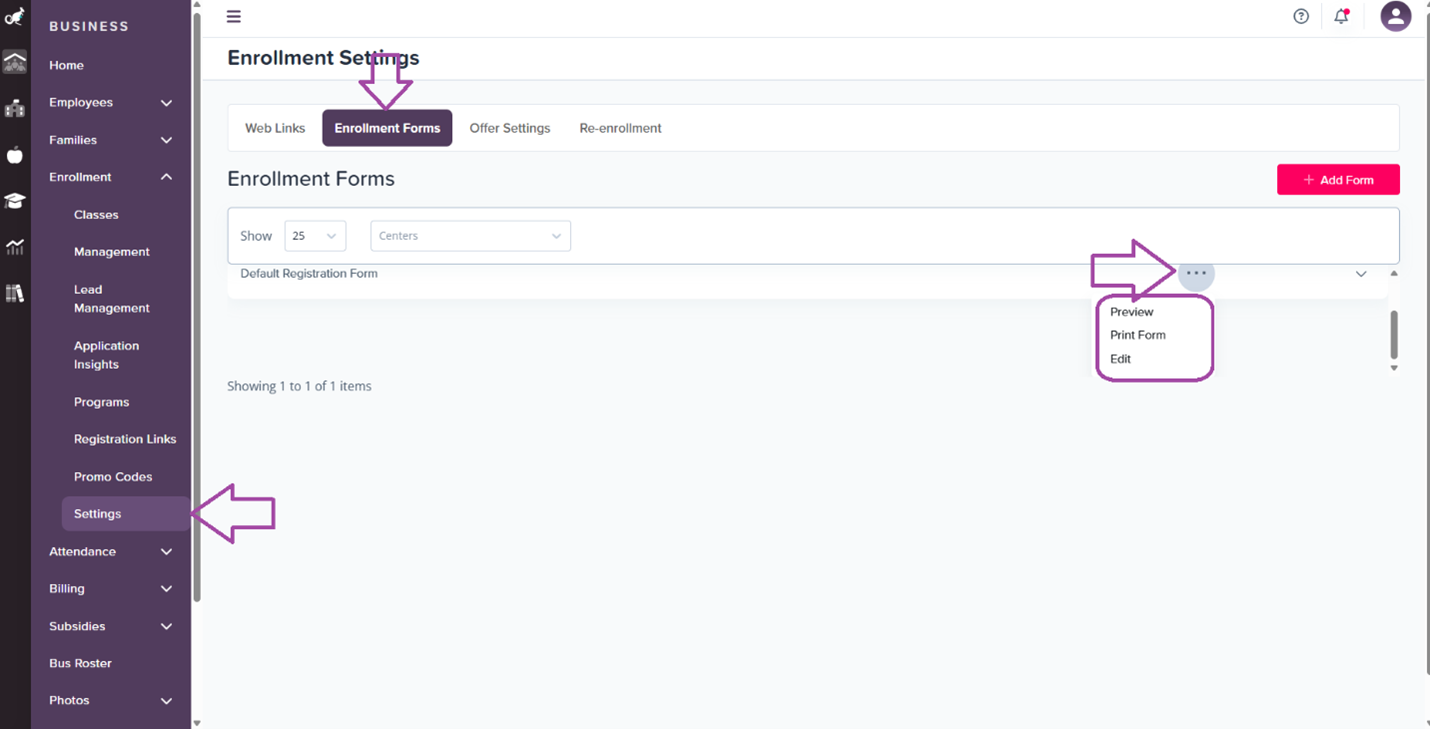
Enrollment Form: Family Information Gathering
This is where family information is gathered during the enrollment process.
To Preview: Click into Settings > Click the three-dot action button > Click Preview.
This will be your default enrollment form, but custom questions can be added by returning to the three dot-action button and clicking Edit.
Step 4: Enroll a Child into the Program
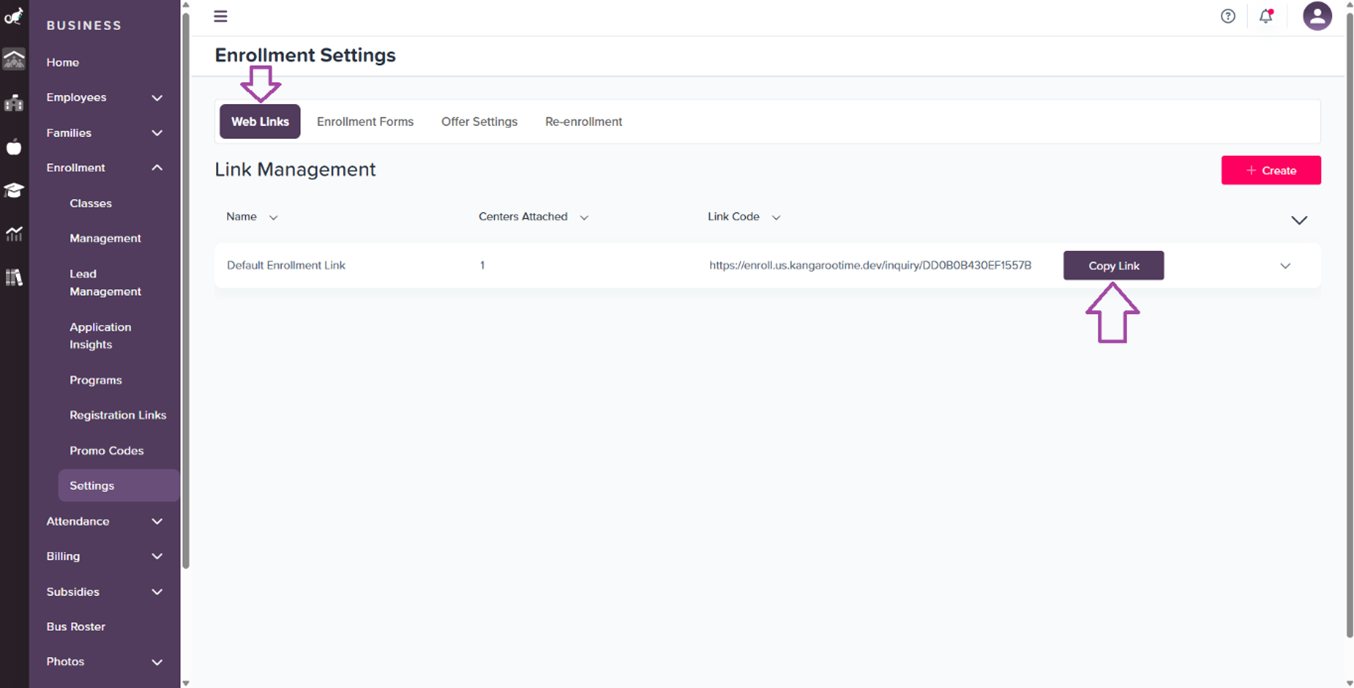
Enrollment Web Link
- Click into Settings > Web Links option
- Click Copy Link
- Open up a new tab and paste the enrollment link
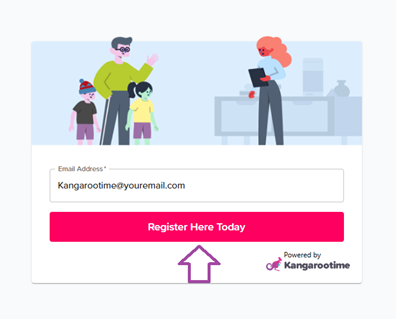
Registration Process
- Enter Registration Information
- Enter an email that you have access to (can be the same email used for your Kangarootime profile)
- Click Register Here Today
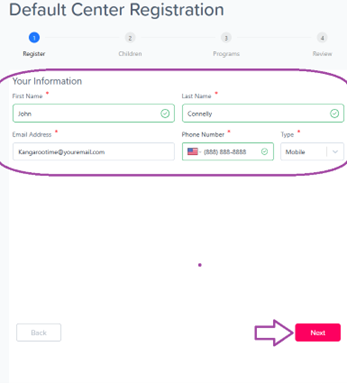
- Complete Your Information
- Enter your information and click Next
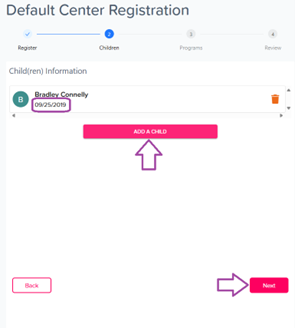
- Add Child Information
-
Add at least one child by clicking Add A Child and fill out their information
📅 Important: The date of birth will impact which programs they will be able to view. If you are unable to view programs, please confirm that their DOB fits inside the associated Class's set age range.
-
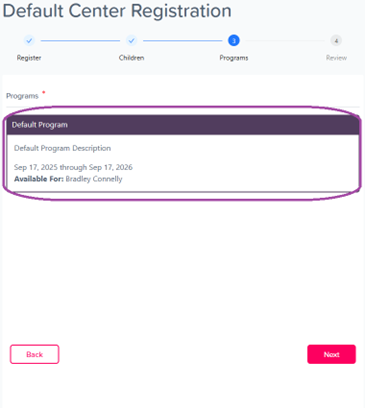
- Select Programs
- Click Next to view available programs
- Select the program(s) you would like to register your child in
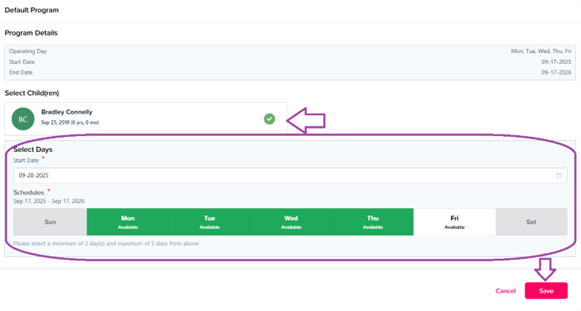
- Set Schedule
- Select the child(ren) and set their start date and their weekly schedule
- Click Save and click Next
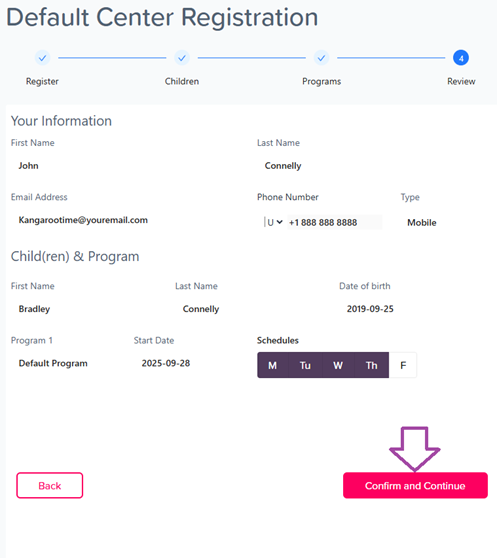
- Review Registration
- Take a moment to look over your registration selection
- Click Confirm and Continue or Back to make any changes
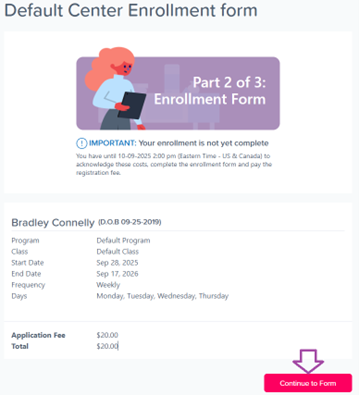
Enrollment Form Completion
- After looking over your registration information, click Continue to Form
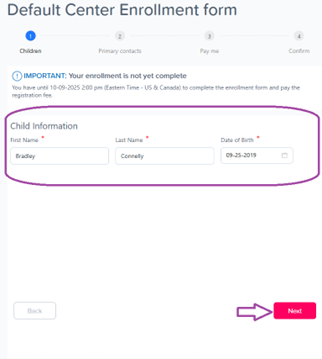
- Child Information
- Enter in the required fields for your child's information and click Next
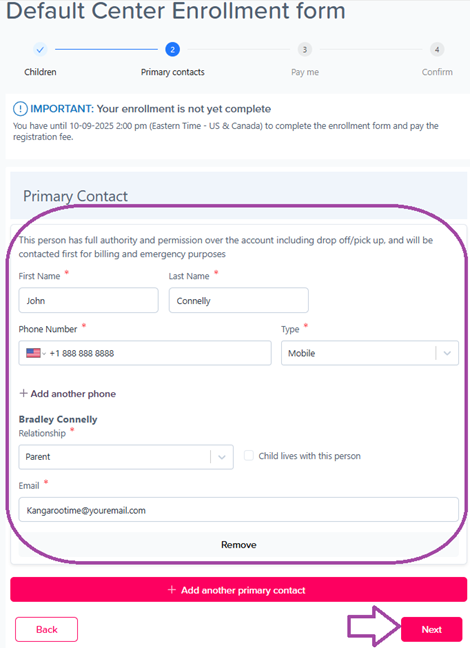
- Primary Contact Information
- Enter in the required fields for Primary contact(s) and click Next
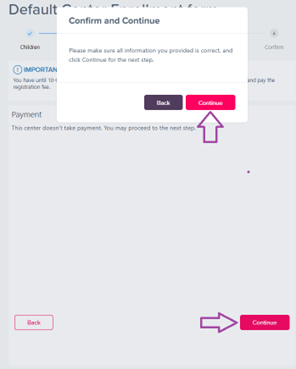
- Payment Method
- No need to enter in a payment method, please click Continue
- Please review your information and click Continue
- Terms and Conditions
- Select the check box agreeing to the Terms and Conditions
- Click Accept and Continue
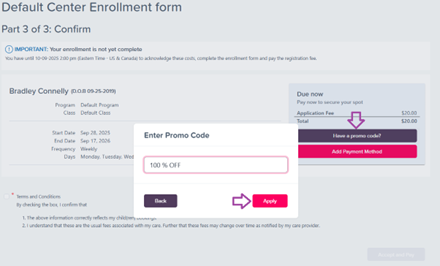
💳 Promo Code: If you did not set the application fee to $0.00, please enter in the following promo code: 100 OFF to remove the charge so you can continue.
Step 5: Take Action on the Enrollment Submission
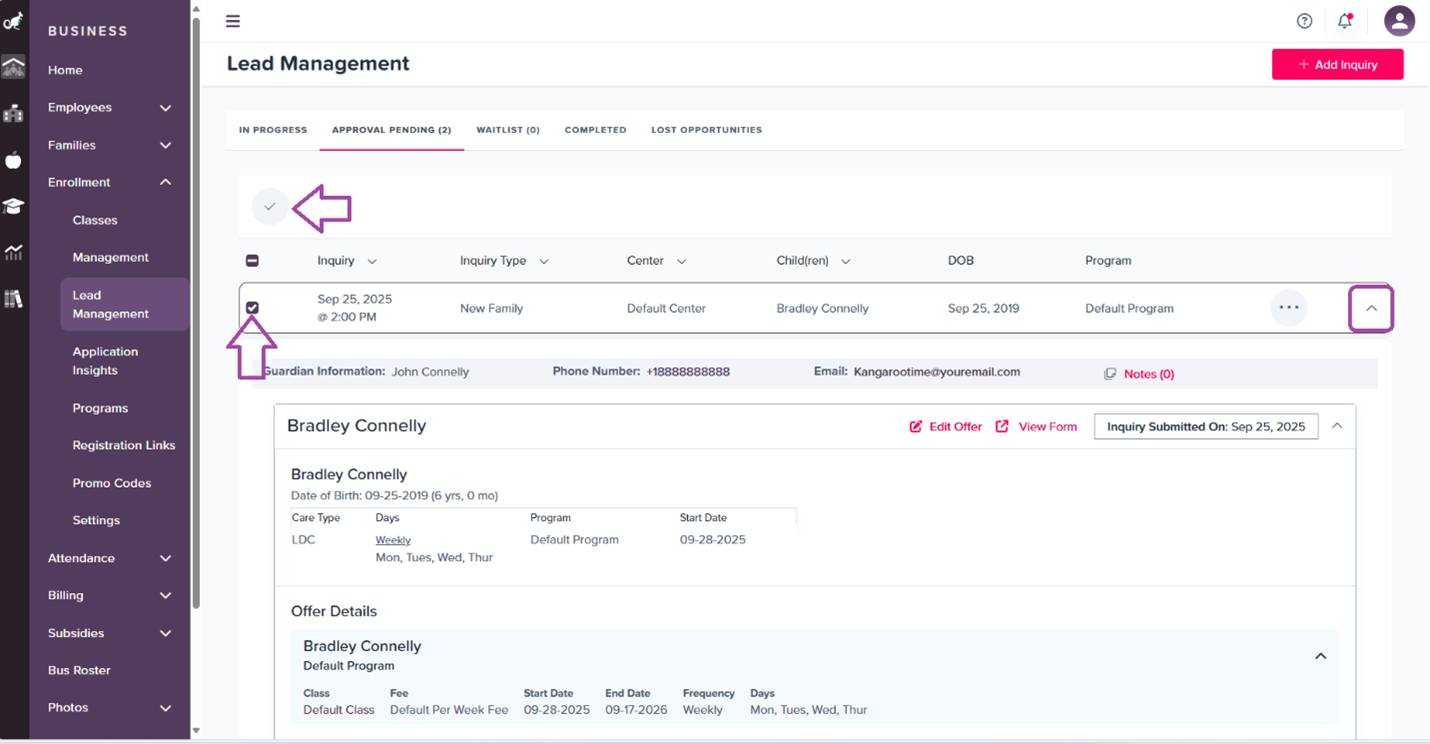
Lead Management
- Navigate to Lead Management
- Head back to the Kangarootime site and click into the Enrollment tab
- Click Lead Management
- Click Approval Pending
- Click the checkbox associated with the enrollment lead
- If you wish to view the lead details, click into the down caret associated with the lead submission
- Click the Check mark icon marked "Approve"
- Confirm your approval by clicking Approve
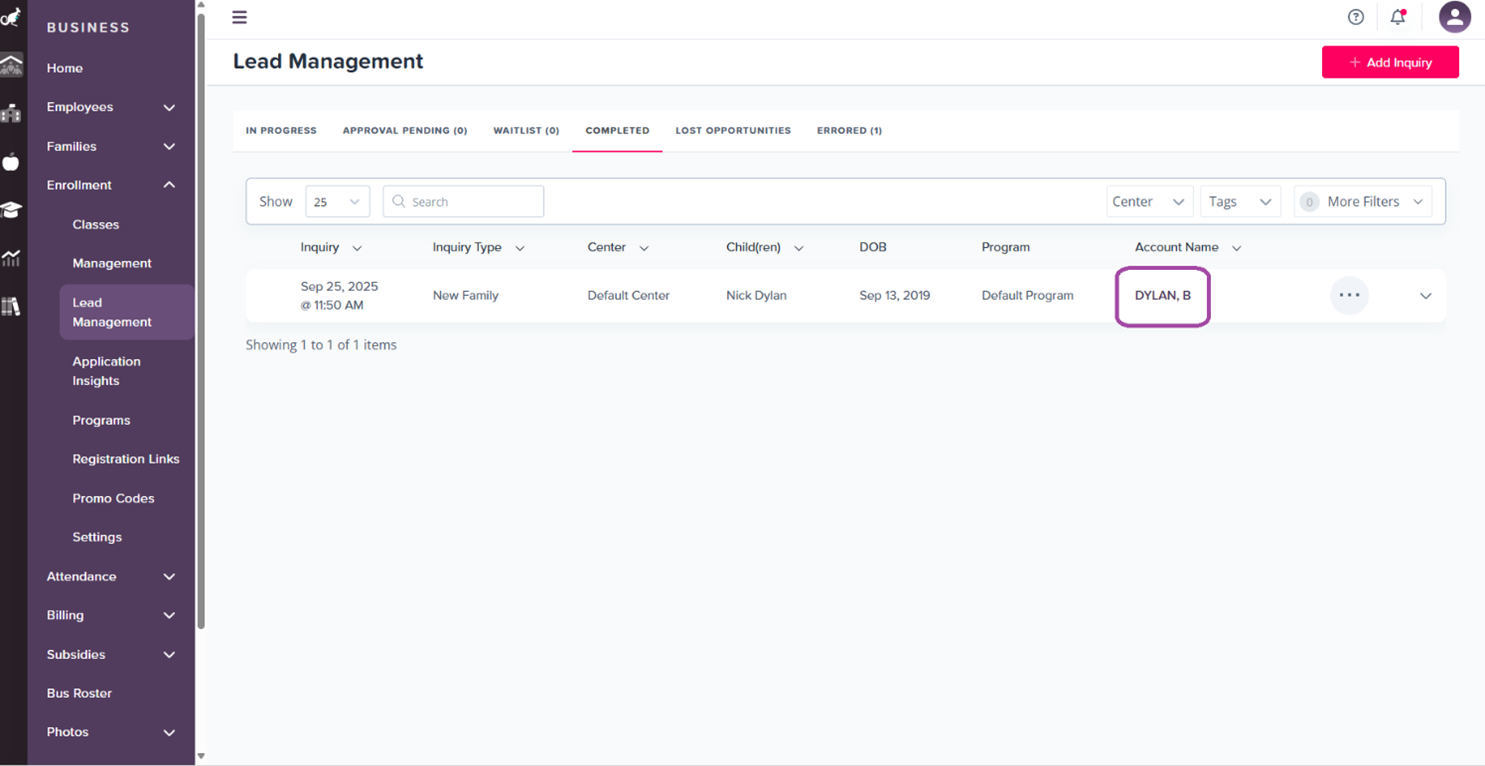
- Complete the Process
- The Lead will now move to the Completed tab under Lead Management
- Click the link under the Account Name column to view their family account
🎉 Congratulations!
You have just reviewed and tested what goes into the enrollment process in Kangarootime!
📚 Additional Resources
Need Help?
- 📖 Complete Documentation - Detailed guides and reference materials
- 🆘 Contact Support - Get help from our team
- 💬 Community Forum - Ask questions from other users
Quick Links
- Get Started Guide - Complete onboarding process
- FAQ - Frequently asked questions
- Glossary - Key terms and definitions
Need help? Contact our support team or check out our comprehensive documentation for additional resources.